NL 11
storingen
wat moet ik doen als…
storing
Verlichting brandt niet.
Afzuigkap maakt lawaai.
Geen afzuiging.
oorzaak
Gloeilamp defect.
Halogeenlamp defect.
let op:
Gebruik uitsluitend dezelfde
lampen met het
aangegeven wattage.
Afvoer te lang of te veel
bochten in het kanaal.
Motor defect.
Motor of bediening defect.
Aansluitsnoer defect.
oplossing
Verwijder de vetfilters. De
lampen zijn nu bereikbaar.
Schroef het lampje uit de
fitting en vervang het door
een nieuwe 40 W
gloeilamp.
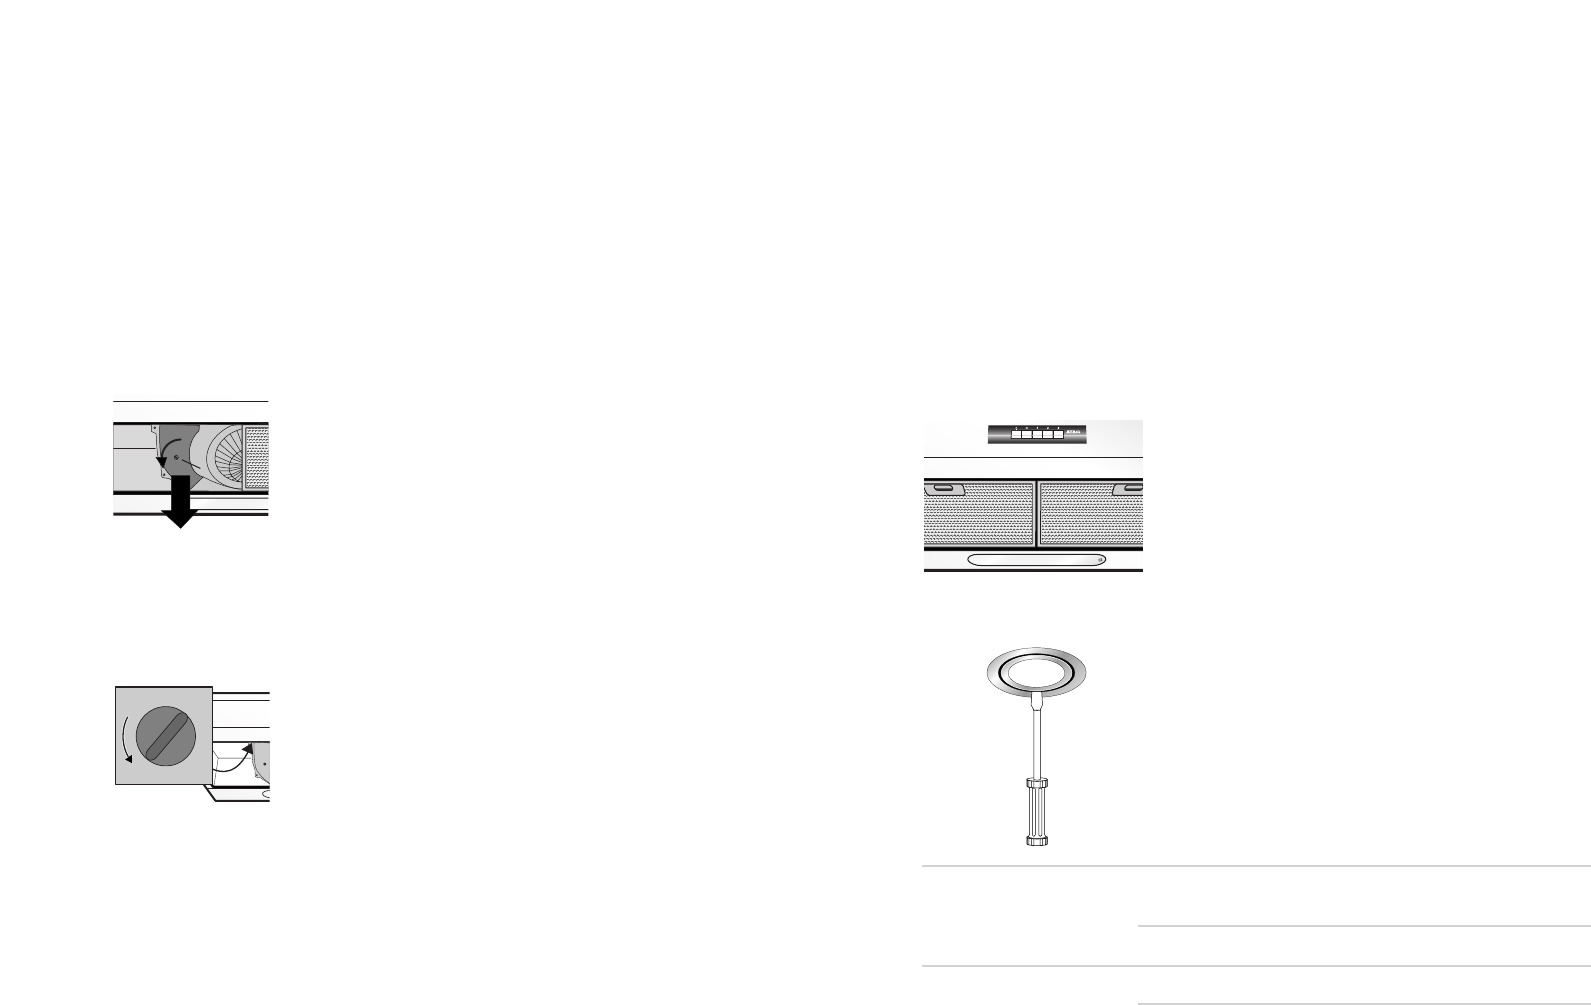
Trek de binnenste ring met
een schroevendraaier naar
beneden (zie illustratie).
Let op: Het glas ligt hier
los in!
Trek het halogeenlampje
uit de fitting en vervang
het door een nieuw
20 W halogeenlampje. Pak
het nieuwe lampje met
een schoon doekje vast.
Verander het afvoerkanaal
(zie hoofdstuk installatie).
Bel de servicedienst.
Bel de servicedienst.
Bel de servicedienst.
Wanneer het toestel niet goed werkt, betekent dit niet altijd dat het defect is. Probeer
het euvel eerst zelf te verhelpen. Bel de servicedienst wanneer onderstaande adviezen
niet helpen.
let op:
Maak het toestel spanningsloos voordat met reparatie wordt gestart. Bij voorkeur door de
stekker uit het stopcontact te halen.
NL 10
onderhoud
reinigen
koolstoffilter
Wanneer u de het toestel als recirculatiekap gaat gebruiken,
moet u eerst het koolstoffilter plaatsen. U moet dan
bovendien de schakelaar, die zich achter in het toestel
bevindt, op F instellen. Het koolstoffilter moet bij normaal
gebruik twee keer per jaar vervangen worden. Bij intensief
gebruik is het noodzakelijk het koolstoffilter vaker te
vervangen.
plaatsen / vervangen
1 Verwijder de vetfilters.
2 Verwijder het deksel van het koolstoffilterhuis.
3 Plaats het koolstoffilter in het koolstoffilterhuis.
4 Borg het filter met de borgstift A.
5 Plaats het deksel van het koolstoffilter terug.
6 Zet eventueel de schakelaar in het toestel op stand "F"
(filtermodus) (zie ook "instellen", hieronder).
7 Plaats de vetfilters terug.
instellen
Verwijder de filters uit de afzuigkap.
Stel de schakelaar, die zich achter in de afzuigkap bevindt, in
op F (filtermodus) wanneer u het toestel als recirculatiekap
gaat gebruiken (de klep is gesloten). U moet dan bovendien
het koolstoffilter plaatsen (zie "koolstoffilter", hierboven).
Stel de schakelaar, die zich achter in de afzuigkap bevindt, in
op A (afvoer) wanneer u de kap aansluit op een afvoerkanaal
(de klep is geopend).
A