MilanoNext Pelletkachel 9 / 15 Rev. 03
9. Klok instellen
Alvorens er een tijdschakeling ingesteld kan worden dient eerst de klok op de juiste tijd ingesteld te worden.
1. Bedien toets (tijdsaanduiding begint te knipper in het display)
2. Verander met toets of de tijd
3. Verzend met toets de tijdinstelling naar de pelletkachel
10. Tijdschakeling instellen (Alleen mogelijk met afstandsbediening)
Het is mogelijk om de pelletkachel tweemaal per dag automatisch aan en uit te laten gaan. Het instellen van de
tijdsblokken kan alleen met de afstandsbediening uitgevoerd worden.
Opm: Indien er een tijdsblok actief moet zijn is het noodzakelijk dat de afstandsbediening altijd kan communiceren met
de pelletkachel. Dit kan alleen als er geen belemmeringen zijn tussen afstandsbediening en de pelletkachel.
Procedure START blok 1 of 2;
1. Bedien toets om start blok 1 in te stellen en toets om start blok 2 in te stellen.
2. Bedien toets of om de gewenste tijd te selecteren (in stappen van 10 minuten).
3. Nadat de juiste tijd is ingesteld dient deze naar de pelletkachel gestuurd te worden door toets te
bedienen.
Procedure STOP blok 1 of 2;
1. Bedien toets om start blok 1 in te stellen en toets om start blok 2 in te stellen.
2. Bedien toets of om de gewenste tijd te selecteren (in stappen van 10 minuten).
3. Nadat de juiste tijd is ingesteld dient deze naar de pelletkachel gestuurd te worden door toets te
bedienen.
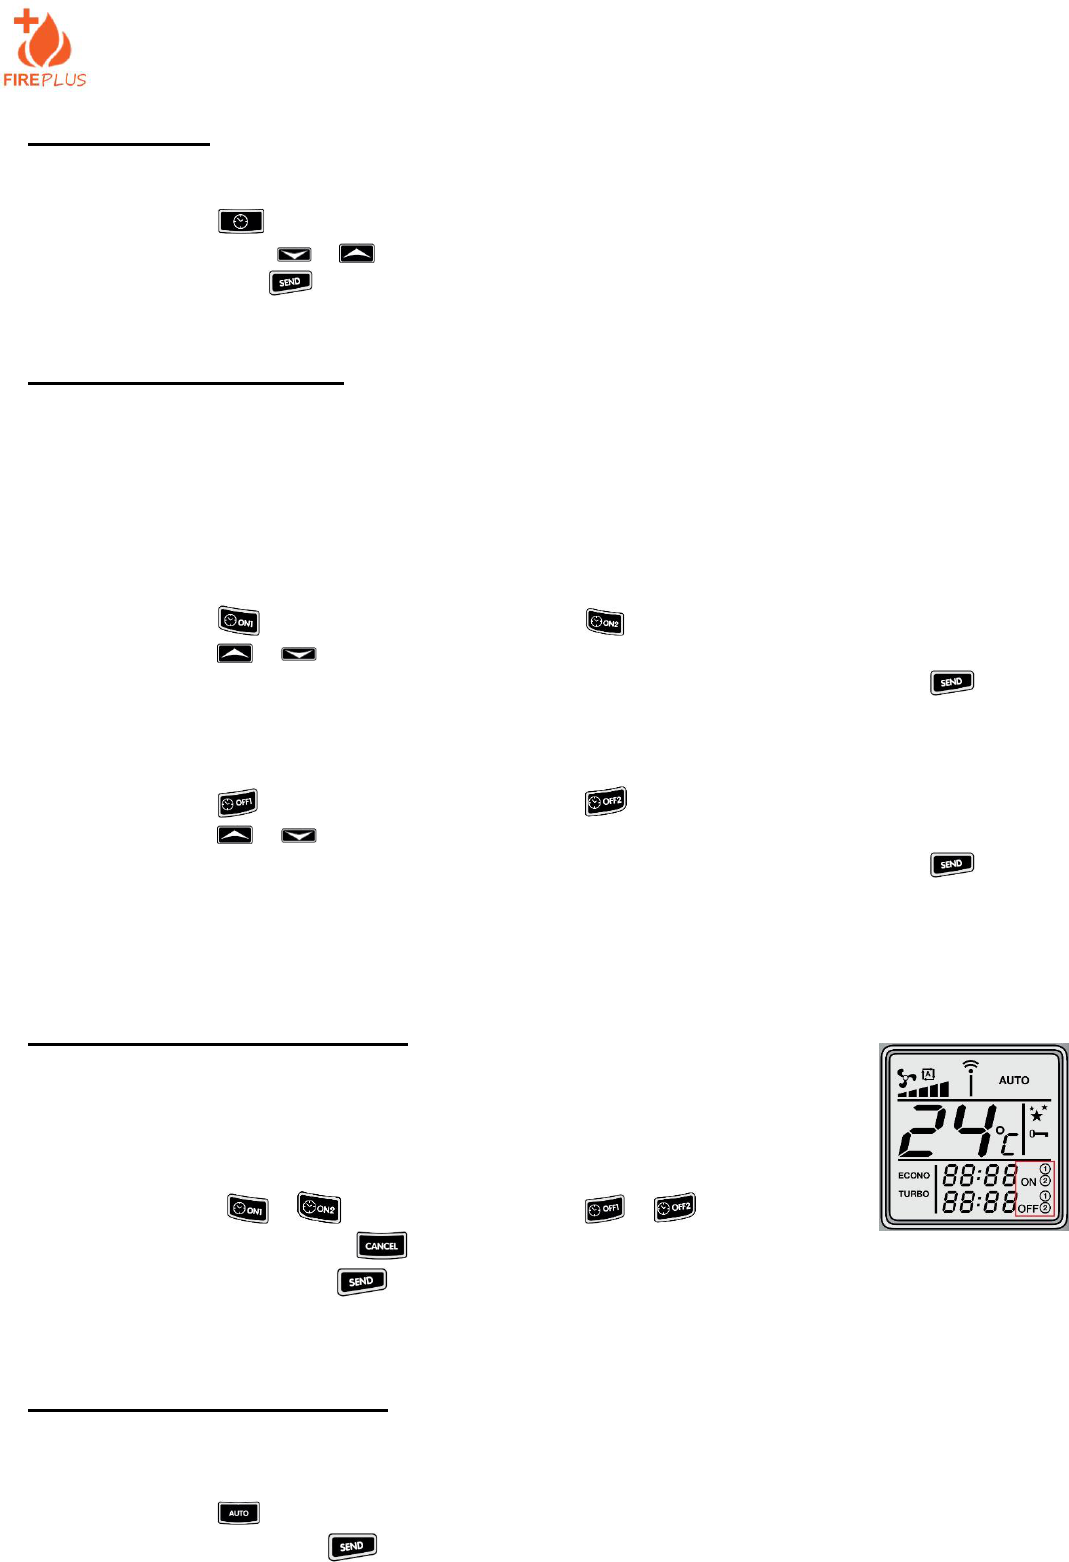
Opm: Zodra er een tijdblok actief is zal het Weekprogramma LED oplichten op het paneel van de pelletkachel.
11. Tijdschakeling uitschakelen (Alleen mogelijk met afstandsbediening)
Volg de volgende stappen om een tijdschakeling weer uit te schakelen:
1. Bepaal op het display van de afstand bediening welke tijdblokken actief zijn
• ON1 en/of 2
• OFF1 en/of 2
2. Bedien toets of voor ON1 of ON2 en toets of voor OFF1 of OFF2
3. Bedien vervolgens de toets (CANCEL)
4. Druk vervolgens op toets (SEND)
5. Het gekozen blok zal nu verdwijnen van het display op de afstandsbediening en niet meer actief zijn
12. Programma actief: Ja / Nee (Alleen mogelijk met afstandsbediening)
Indien er tijdsblokken actief zijn kunnen deze dagelijks herhaald worden. Doorloop de volgende procedure om de
tijdklokken dagelijks te laten repeteren:
1. Bedien toets totdat er “Auto” in het display verschijnt.
2. Druk vervolgens op toets (SEND).
Opm: Auto kan alleen geactiveerd worden indien er een tijdblok actief is.