English
C31/P38/P1
E-11
Ampli er Gain Switch (P1)
This switch is to allow the gain of the P1 ampli er to be changed to suit your system requirements.
With the switch in, the gain is set to standard ARCAM gain of 31.5dB. This is the normal setting,
which allows the P1 to be used in systems where there are other ARCAM power ampli ers (excluding
the Arcam P7).
With the switch out, the gain is set to ‘THX standard gain’. Use this setting if your P1 is to be used in
systems containing ampli ers with THX gain (for example, the Arcam P7).
Daisy chaining
Both the P38 and the P1 can be connected to further power ampli ers to drive more speakers (e.g.,
those in other rooms, tri-ampli ed speakers, etc). This technique is called ‘Daisy chaining’.
Connect the AUDIO OUT sockets on the P38/P1 to the pre-amp. input of the next ampli er in series, left
to left, right to right.
Remote switching
By making a connection from the TRIG OUT socket of the C31 pre-amp. to the REMOTE IN socket of
your P38/P1, you can use the C31 to switch the power ampli er on and off. If con gured in this way,
the front panel POWER button of the C31 (or the POWER button on the remote control) switches both
ampli ers on and off together. This facility allows you to position your power ampli er in a remote
location (such as close to the speaker it is amplifying), yet still control it.
The connecting cable to use is a 3.5mm jack lead, wired as given on page 5. It is possible to connect
several power ampli ers to a C31 by ‘daisy chaining’ from the TRIG OUT of one power ampli er into the
REMOTE IN of the next.
Connecting loudspeakers
Wiring strategies
There are three different wiring strategies that can be employed to connect your ampli er to your
speakers. The choice will be limited by what your speakers can support.
n
Single wiring
Single wiring is the conventional wiring method of running a single cable per channel between the
ampli er and the speaker. This is the easiest technique.
n
Bi-wiring
Bi-wiring is running two separate cables between the ampli er and each speaker, with one cable
carrying the low-frequency information, the other the higher-frequency signals. The P38 and P1
are designed to allow easy bi-wiring, but speakers support it only if separate connection terminals
are provided for the two cables (the speaker will have two pairs of terminals on the back, one pair
labelled ‘HF’ or ‘High Frequency’, the other pair labelled ‘LF’ or ‘Low Frequency’).
Why is this useful?
Bi-wiring improves the sound of your system because the separation of high- and low-frequency
signal currents into separate speaker cables avoids distortions caused by the different currents
interacting with one-another within a single cable, as occurs in single-wired systems.
n
Bi-amping
Bi-amping is the separation of the ampli cation of low- and high-frequency signals over two
ampli ers. You will require two ampli ers to do this.
Why is this useful?
The performance of your system is enhanced over bi-wiring by extending the signal separation
principle to use separate ampli cation for the low and high frequency drivers in each speaker.
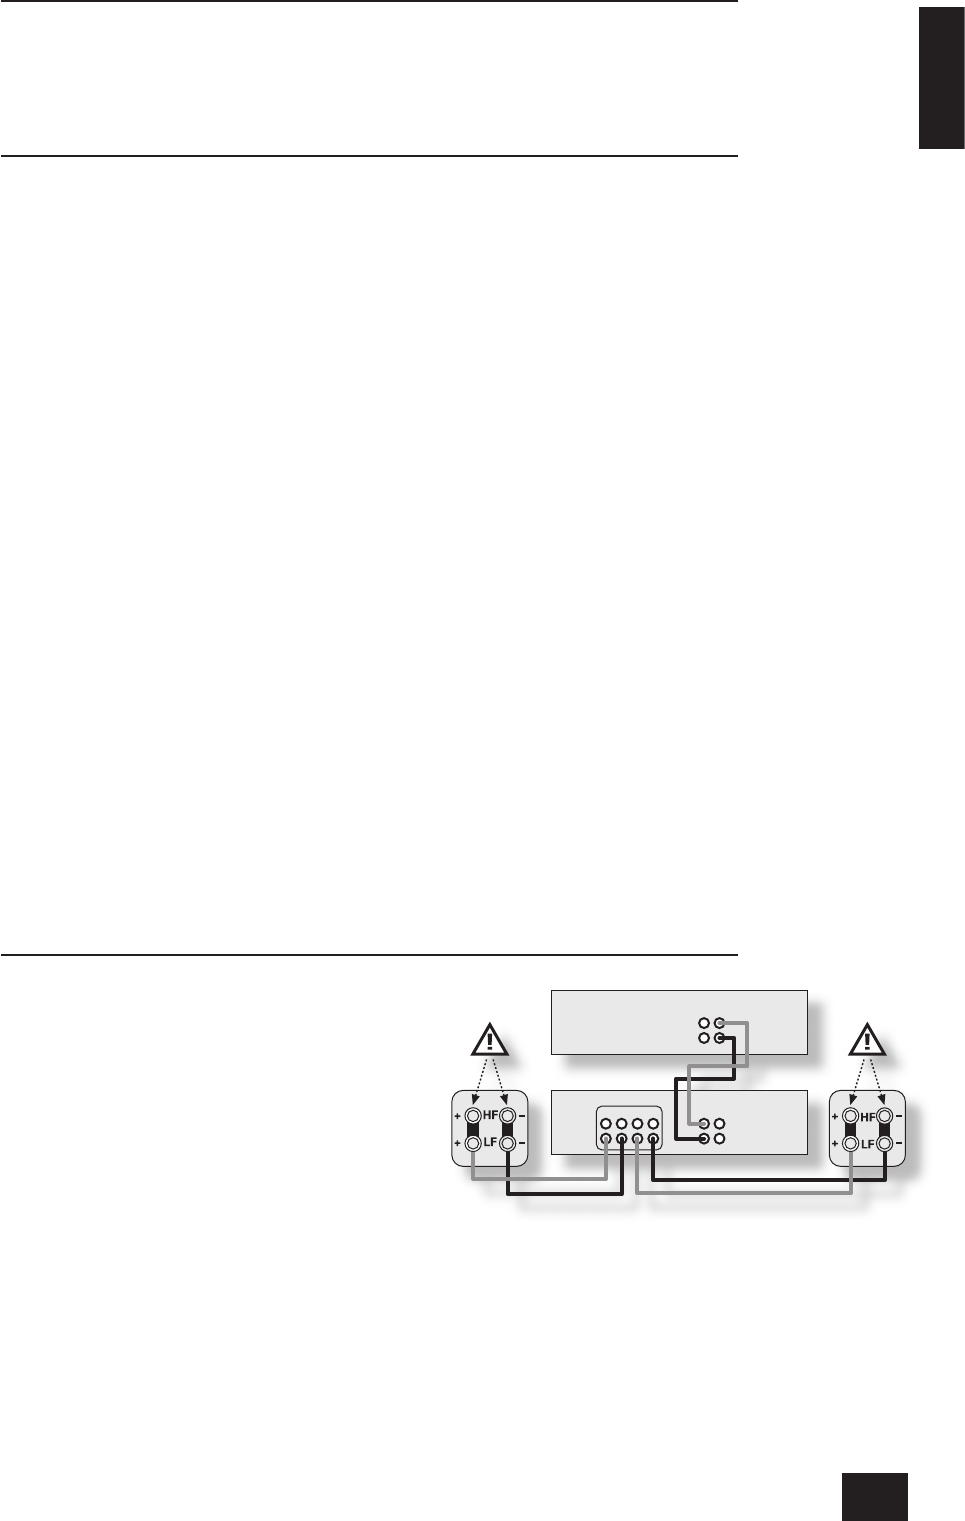
Single wiring
Both the P38 and the P1 are designed for bi-wiring, which
is why there are duplicate speaker terminals on the back.
Both amps are quite happy with single-wiring, however; we
recommend that you use the lower sets of speaker terminals
(labelled ‘SP1’ on the P38) in this case. Similarly, if your
speaker has more than one pair of connecting terminals, use
the terminals labelled ‘LF’ or ‘Low Frequency’ on the speaker.
For the P38, connect the positive terminal of the right
speaker connection on the ampli er (coloured red and
labelled ‘+R’) to the positive terminal of your right speaker.
Similarly, connect the negative terminal of the ampli er
(coloured black and labelled with ‘R–’) to the negative
terminal of your speaker. Repeat the process for the left
speaker, using the ampli er terminals labelled ‘+ L –’.
For the P1, connect the positive speaker terminal (coloured
red and labelled ‘+’) to the positive terminal of the speaker to
be driven. Similarly, connect the negative terminal of the ampli er (coloured black and labelled ‘–’) to
the negative terminal of the same speaker. Repeat the process for your other P1 and speaker.
If your speakers support bi-wiring, then there is a strip of metal on the speakers connecting the low-
frequency terminals to those for the higher-frequencies; this must not be removed in a single-wired
system.