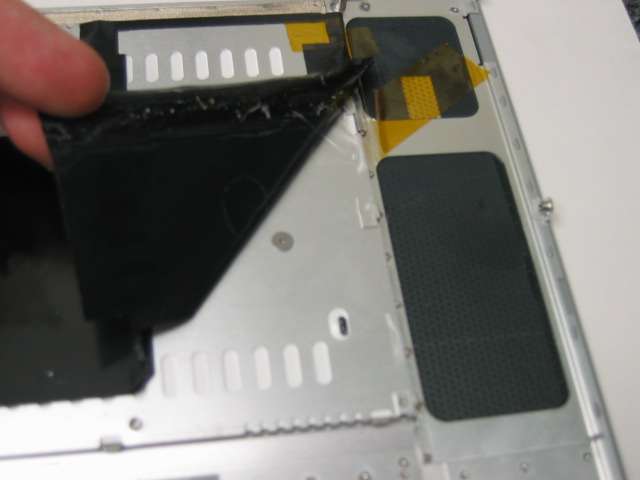
to help make the backlighting on the keys a little
brighter. Removing this without tearing is a
tricky task. It is best to start on the edges and
free those first where the black backing overlaps
the sides. Once that is free you can start peel-
ing the backing from one of the corners. It is
best to take it slow unless your new keyboard
including a new backing. Just continue to
slowly peel it towards the center. It is made up
of two separate pieces. If your new keyboard
doesn’t contain a new package, place these two
old pieces to the side with sticky side up. Take
note of which side of the backing goes where,
but it will later be explained how to match up the
correct sides just in case you mixed them up.
If you accidentally tear the backing, don’t
fret. This isn’t a vital piece but it is good to have
on there even if it is a little torn.
Free the Keyboard
After getting the black backing off, you
should see several screws holding the keyboard
in. There should be 10 in total dispersed around
the back of the keyboard. All of these should be
short threaded Philips screws with large unpol-
ished heads.
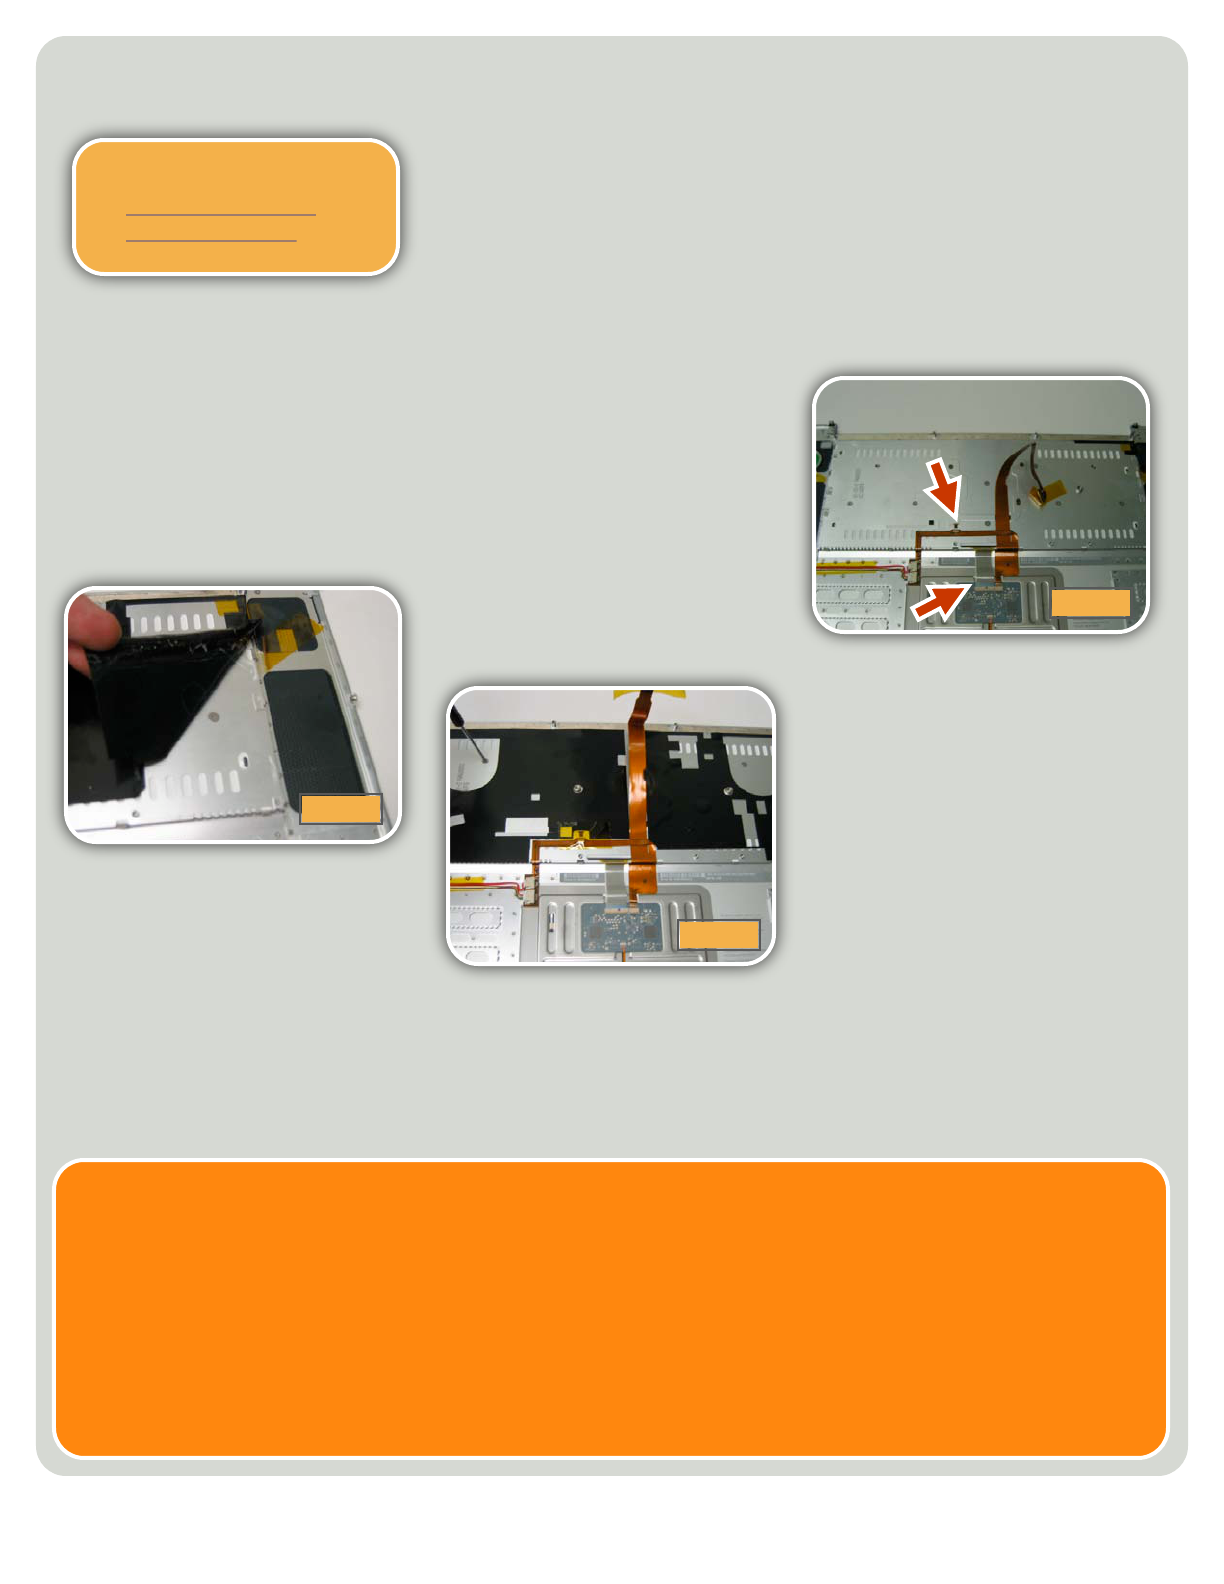
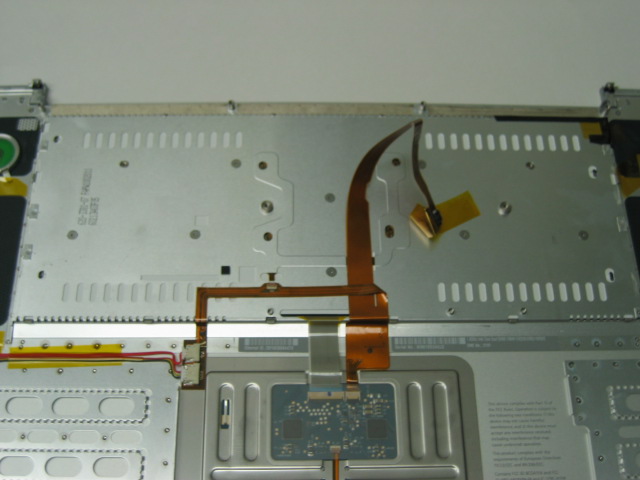
After all of those screws are removed, we
need to disconnect the two cables coming from
the keyboard. The white and gray striped ribbon
cable is the keyboard’s data cable. It informs
the processor what key is being pressed. This
cable connects to the circuit board underneath
the trackpad. This circuitry is usually covered
by a thin rectangular piece of transparent plas-
tic. It is best to just peel it off from the edges
until you can get to the cable connections un-
derneath. The connector type is a common one
found in Apple products. The cable is locked in
place by a small bar that needs to be flipped
upright into the unlocked position. Be very gen-
tle as breaking this could require a new top
case. Once the bar is flipped up, you should be
able to pull the keyboard cable out. The other
cable is the backlight cable. It is a very small
orange cable coming out just above and to the
left of the data cable. This is a similar style con-
nector. The bar needs to be flipped up and the
cable pulled out.
One more thing needs to be done to free
the keyboard. Along the top of the keyboard
while looking on the back of the top case, you
should see several metal hooks lining the top.
These little hooks need to be twisted counter-
clockwise in order to unlock the keyboard.
Once that is complete, you can safely remove
the keyboard.
Replacing the Keyboard
To install the new keyboard, it is best to
slide it into the bottom, and then slightly bend
the sides in in order to fit the tabs on the sides
into their appropriate grooves. Make sure you
feed the backlight cable and data cable through
their slots so we can connect them after the
keyboard is in. Once it is in well, you can screw
the keyboard back in with the ten screws, twist
the hooks to lock the top into position, and con-
nect the data cable and backlight cable.
The best way to line up the backing is to
line up the two large screw holes with the holes
in the backing.
[13]
Keycap vs. Keyboard Issues
The keyboard on a laptop gets a lot of punishment over the years. With the use, exposure, and convenience for accidents, the keyboard can get
a lot of damage. If a key stops working, don’t jump to the conclusion that you just ruined your keyboard. You may just need a new key which we sell
at our online store.
If the character on your key has worn off, or your key has popped off and you can’t get it back on, most likely you just need to replace the keycap
and scissor mechanism. This will save you a lot of money over having to buy a full keyboard. The procedure for replacing the key is fairly simple, and
we offer a small manual on how to replace keys on our website.
Usually with spills, the keyboard is going to be affected as a whole. If several keys in a certain region stop working, or there is no response at all,
most likely the entire keyboard will need to be replaced.
Libble takes abuse of its services very seriously. We're committed to dealing with such abuse according to the laws in your country of residence. When you submit a report, we'll investigate it and take the appropriate action. We'll get back to you only if we require additional details or have more information to share.
Product:
Forumrules
To achieve meaningful questions, we apply the following rules:
First, read the manual;
Check if your question has been asked previously;
Try to ask your question as clearly as possible;
Did you already try to solve the problem? Please mention this;
Is your problem solved by a visitor then let him/her know in this forum;
To give a response to a question or answer, do not use this form but click on the button 'reply to this question';
Your question will be posted here and emailed to our subscribers. Therefore, avoid filling in personal details.
Register
Register getting emails for Apple MacBook Pro at:
new questions and answers
new manuals
You will receive an email to register for one or both of the options.
Get your user manual by e-mail
Enter your email address to receive the manual of Apple MacBook Pro in the language / languages: English as an attachment in your email.
The manual is 3,76 mb in size.
You will receive the manual in your email within minutes. If you have not received an email, then probably have entered the wrong email address or your mailbox is too full. In addition, it may be that your ISP may have a maximum size for emails to receive.
If you have not received an email with the manual within fifteen minutes, it may be that you have a entered a wrong email address or that your ISP has set a maximum size to receive email that is smaller than the size of the manual.
The email address you have provided is not correct.
Please check the email address and correct it.
Your question is posted on this page
Would you like to receive an email when new answers and questions are posted? Please enter your email address.
