3 Druk op de toets TUNE om de indicatoren “DX”
en “SEEK” te doen oplichten op het display.
Wanneer de DX-modus geactiveerd is, houdt de
automatische zoekfunctie halt bij zowel sterke
als zwakke zenders.
Druk opnieuw op de toets om terug te keren
naar de lokale modus. De indicator “DX” zal
doven en de indicator “SEEK” zal blijven
oplichten. Nu wordt enkel nog afgestemd op
sterke zenders.
4 Druk op de toets 4 of ¢ om respectievelijk
hoger of lager automatisch naar een zender te
zoeken.
Het toestel stopt bij de eerstvolgende zender die
het vindt.
Druk opnieuw op dezelfde toets om de volgende
zender te zoeken.
Manueel opslaan van preselectiezenders
1 Selecteer de radioband en stem af op de
radiozender die u in het preselectiegeheugen wilt
opslaan.
2 Vergewis u ervan dat de functie-indicator aan de
bovenkant van de “F”-toets oplicht en houd de
preselectietoets (1 tot en met 6) waaronder u
de zender wilt opslaan minstens 2 seconden
lang ingedrukt. De geselecteerde zender is nu
opgeslagen in het geheugen.
Het display toont de opgeslagen frequentieband,
het preselectienummer met een driehoek ( )
en de zenderfrequentie die in het geheugen zijn
opgeslagen.
6-NE
Manueel op zenders afstemmen
1 Druk op de SOURCE-toets tot de radiofrequentie
op het display verschijnt.
2 Druk herhaaldelijk op de toets BAND tot het
display de gewenste radiofrequentieband toont.
Door herhaaldelijk te drukken selecteert u
achtereenvolgens de volgende modi:
F1 F2 MW LW
3 Druk herhaaldelijk op de toets TUNE tot “DX
SEEK” en “SEEK” van het scherm verdwijnen.
OPMERKING
De beginmodus is DX SEEK.
4 Druk op de toets 4 of ¢ om respectievelijk een
stap vooruit of achteruit te gaan tot het display de
frequentie van de gewenste zender toont.
OPMERKING
De indicator ST verschijnt op het display wanneer er
afgestemd is op een Stereo-FM-zender. Indien het stereo-
FM-signaal verzwakt, verdwijnt de indicator ST van het
display en schakelt het toestel automatisch over naar mono
om het geruis te beperken. Wanneer het signaal opnieuw
sterk genoeg wordt, schakelt het toestel automatisch terug
naar stereoweergave.
Automatisch zenders zoeken
1 Druk op de SOURCE-toets tot de radiofrequentie
op het display verschijnt.
2 Druk herhaaldelijk op de toets BAND tot het
display de gewenste radiofrequentieband toont.
Door herhaaldelijk te drukken selecteert u
achtereenvolgens de volgende modi:
F1 F2 MW LW
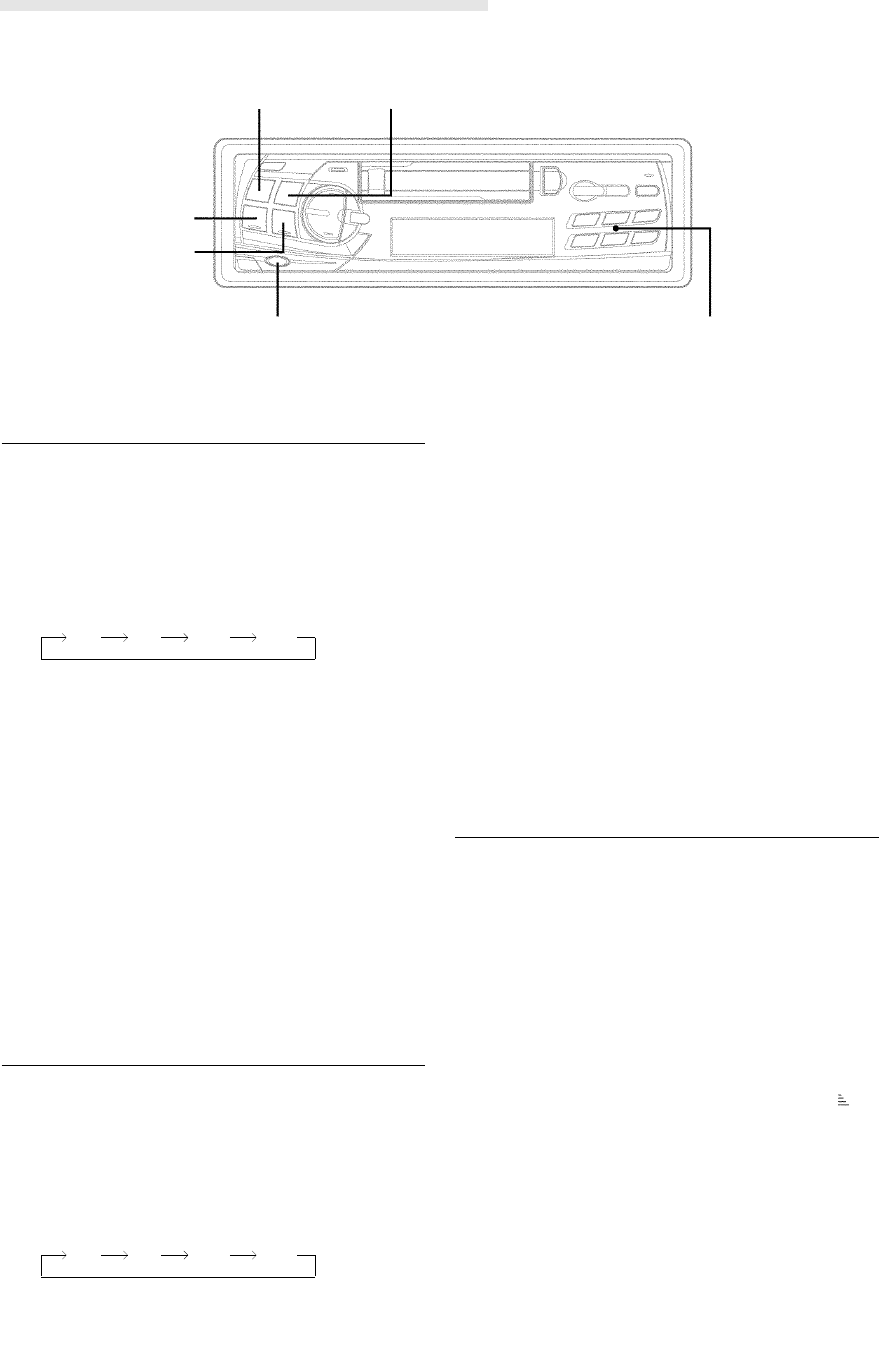
4
¢
TUNE / A.ME
SOURCE BAND
Preselectietoets (1 tot en met 6)
Radiobedieningen