17
Reiniging en onderhoud
Om hygiënische redenen dient het apparaat aan de binnenkant met toe-
behoren geregeld gereinigd te worden.
Waarschuwing!
• Het apparaat mag tijden het schoonmaken niet op het elektriciteitsnet aan-
gesloten zijn. Gevaar voor schokken! Zet voor het schoonmaken het appa-
raat uit en trek de stekker uit het stopcontact of schakel de zekering uit.
• Het apparaat nooit met stoomreinigingsapparaten schoonmaken. Er kan
vocht in de elektrische onderdelen komen. Gevaar voor schokken! Hete
damp kan kunstof onderdelen beschadigen.
• Het apparaat dient droog te zijn voordat het weer in gebruik genomen
wordt.
Let op!
• Etherische oliën en organische oplosmiddelen kunnen kunststof onderde-
len aantasten, bijv.
– Sap van citroen– of sinaasappelschillen;
– boterzuur;
– schoonmaakmiddelen die azijnzuren bevatten.
Dergelijke substanties niet in contact brengen met apparaatonderdelen.
• Geen schurende schoonmaakmiddelen gebruiken.
1. Koel– en diepvriesartikelen er uit halen. Diepvriesartikelen in meerdere
lagen kranten verpakken. Alles afgedekt op een koele plaats leggen.
2. Vriesvak voor het schoonmaken ontdooien (zie hoofdstuk “Ontdooien”).
3. Apparaat uitzetten en de stekker uit het stopcontact halen of de zekering
Apparaat uitzetten
Voor het uitzetten de temperatuurregelaar op stand “0” draaien.
Als het apparaat gedurende langere tijd niet gebruikt wordt:
1. Levensmiddelen uit koelruimte en vriesvak nemen.
2. Apparaat uitzetten, daartoe de temperatuurregelaar op stand “0” draaien.
3. Stekker uit het stopcontact halen of zekering in de huisinstallatie uit-
schakelen.
4. Diepvriesruimte ontdooien en grondig reinigen (zie hoofdstuk “Reiniging en
onderhoud”).
5. Deuren daarna open laten om geurvorming te voorkomen.
28
Rehingeing the door
The side at which the door opens can be changed from the right side (fac-
tory adjustment) to the left side, if the installation site requires.
Warning! When changing the side at which the door opens, the appliance
may not be connected to the mains. Remove plug from the mains before
hand.
Procced as follow:
1. Remove the ventilationgrill (D) and
the plastic cover (G).
2. Remove plug (F) and refit it on the
opposite side of the ventilation-
grill.
3. Unscrew the bottom hinge and
remove the freezer compartment
door by pulling it downwards.
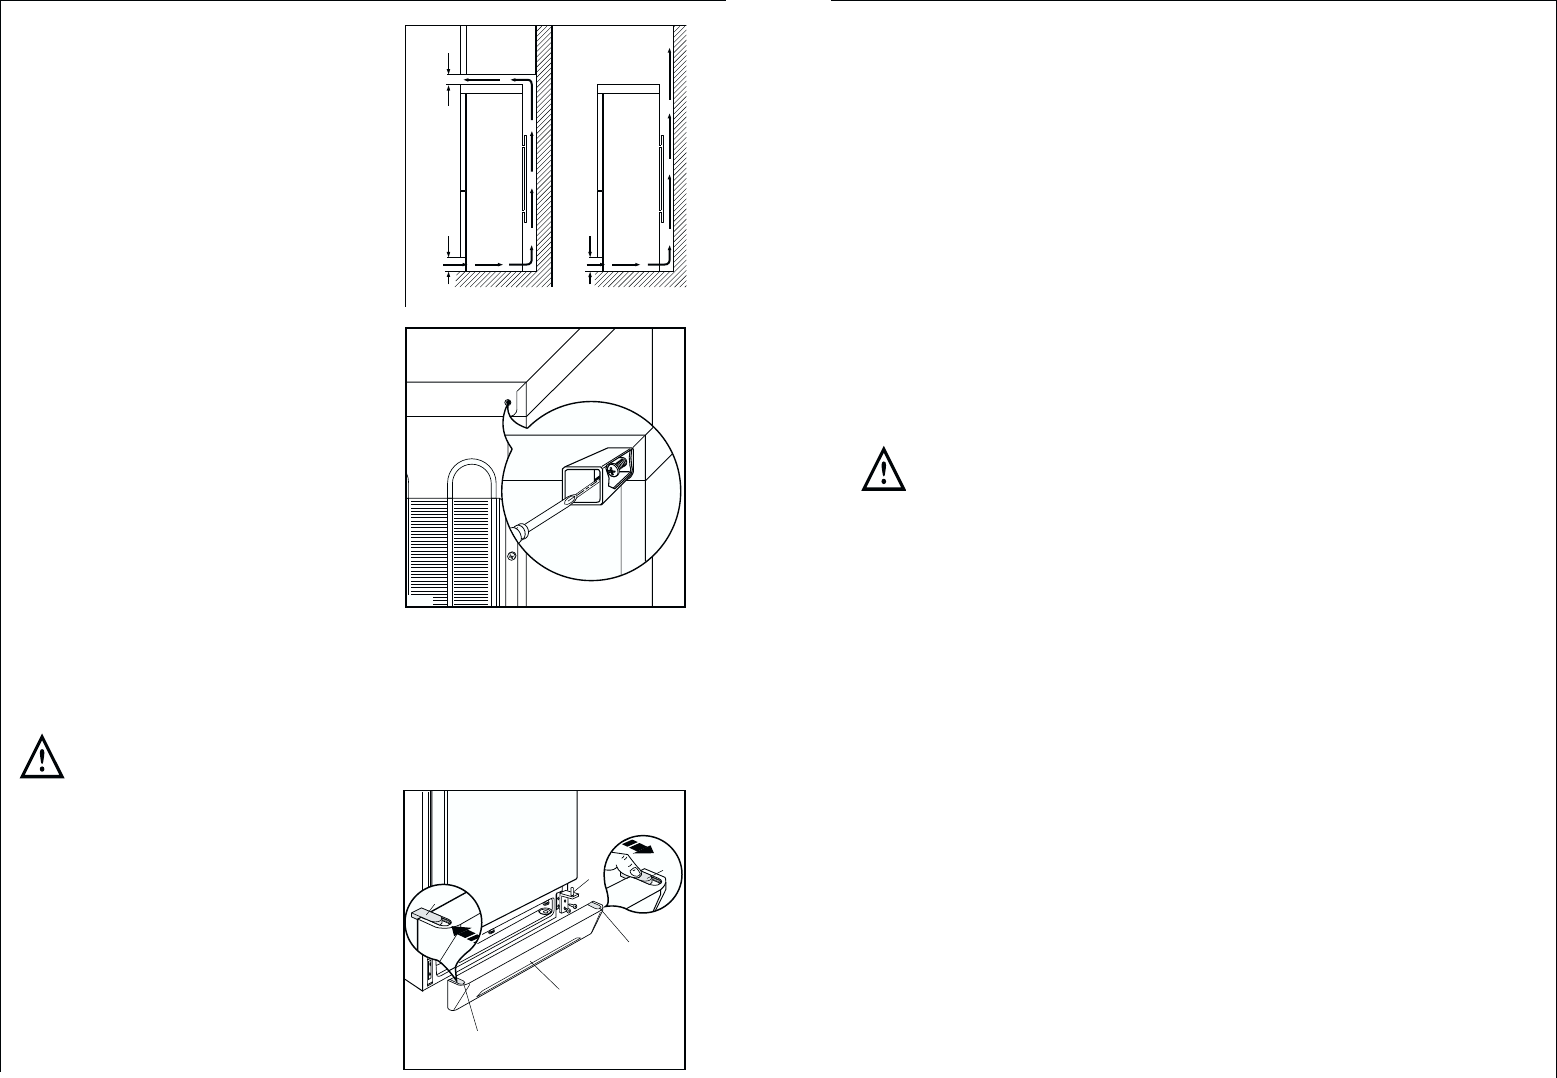
Your appliance needs air
For safety reasons, minimum ventila-
tionmust be as shown Fig.
Attention: keep ventilation ope-
nings clear of obstruction;
Rear spacers
Fit the rear spacers contained in
the documentation bag to ensu-
re even dissipation of heat gene-
reted during operation. Proceed
in the sequence illustrated by the
figures.