9
4. Verwijder de beschermdopjes van de
schroeven linksonder en plaats ze op
de schroeven rechts.
5. Draai de twee schroeven links-onder
los.
6. Schroef het middenscharnier los;
verwijder de deur van de koelruimte
door hem naar beneden te schuiven
7. Draai met een schroevendraaier de
twee beschermdopjes op de gaatjes
links los en monteer ze aan de rech-
terkant.
8. Draai de stift van het bovenscharnier
los en monteer haar aan de
linkerkant.
9. Plaats de deur van de koelruimte op
de bovenstift.
10. Plaats het middenscharnier in het
onderste deel van de deur van de
koelruimte; vergeet de sluitringetjes
niet.
11. Schroef het middenscharnier stevig
vast.
12. Plaats de deur van de vriesruimte op
het middenscharnier.
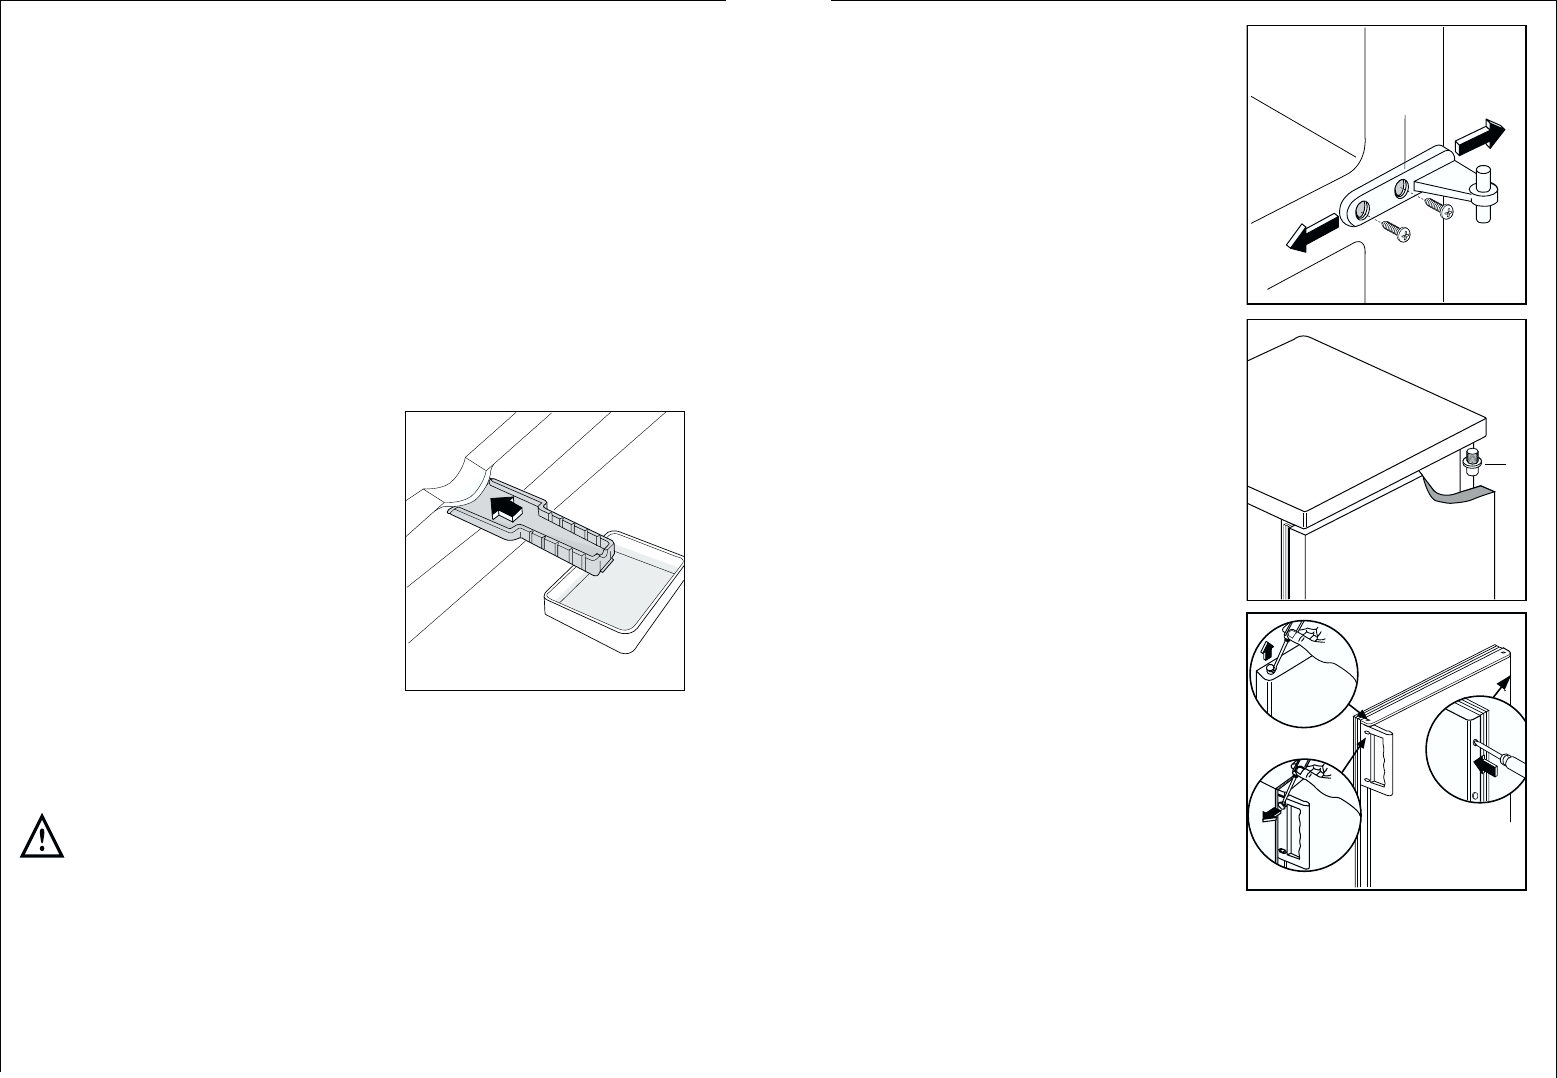
13. Hermonteer het onderscharnier (E)
aan de andere kant door middel van
de twee schroeven die u eerder
verwijderd hebt.
14. Verwijder het stopstuk (F) uit het
ventilatierooster (D) door het naar de
pijlrichting te duwen en breng het
aan de andere kant weer aan.
15. Hermonteer het ventilatierooster (D),
voer het door palwerk in.
36
Defrosting
Refrigerator
Frost is automatically eliminated from the evaporator of the refrigerator
compartment every time the motor compressor stops, during normal use.
The defrost water drains out through a trough into a special container at
the back of the appliance, over the motor compressor, where it evaporates.
Freezer
The freezer compartment, however, will become progrssively covered with
frost. This should be removed with the special plastic scraper provided, whe-
never the tickness of the frost exceeds 4 mm. During this operation it is not
necessary to switch off the power supply or to remove the foodstuffs.
However when the ice becomes very thick on the inner liner, complete
defrosting should be carried out as follows:
1. Remove the frozen food from the
freezer, wrap it in several layers of
newspaper and put it in a very
cool place.
2. Switch off the appliance and pull
out the plug, or remove or
unscrew the safety fuses.
3. Leave the freezer compartment
door open.
4. Insert the plastic scraper into the
recess provided under the defrost
water channel and place a collec-
ting basin under it.
5. Once defrosting is completed keep the scraper for future use;
6. Turn the thermostat knob to the required setting or replace the plug in the
power socket.
Warning!
Never use metal tools to scrape off the frost
Do not use a mechanical device or any artificial means to speed up the
thawing process other than those recommended by the manufacturer.
A temperature rise of the frozen food packs, during defrosting , may shor-
ten their safe storage life.