15
• Lavez le joint de porte en caoutchouc sans omettre de nettoyer également
sous le joint.
Compartiment congélateur
A l’occasion d’un dégivrage, lavez la cuve, les tiroirs et le joint de porte à l’ai-
de d’une éponge et d’un détergent doux. Rincez et séchez soigneusement.
Nettoyage extérieur
Lavez l’ensemble de la carrosserie à l’eau tiède savonneuse. Rincez et séchez
soigneusement.
De temps en temps, dépoussiérez le condenseur (grille située à l’arrière de
l’appareil) à l’aide d’un aspirateur ou d’une brosse.
Remplacement de l’ampoule d’éclairage
L’ampoule est accessible à travers l’ouverture prévue à cet effet dans le dif-
fuseur.
Pour remplacer l’ampoule
• Débranchez l’appareil.
• Dévissez la vis de fixation du
diffuseur.
• Décrochez la partie mobile en
exerçant une pression sur celle-
ci.
• Remplacez l’ampoule par un
modèle semblable (max. 15W).
• Replacez le cache et la vis de fixation.
• Rebranchez l’appareil.
En cas d’absence prolongée ou de non-utilisation
Ramenez le thermostat sur la position “ 0 ”.
Débranchez, videz, dégivrez et nettoyez l’appareil.
Maintenez les portes entrouvertes pendant toute la durée de non-utili-
sation.
Si toutefois, vous n’avez pas la possibilité de débrancher et vider l’appareil,
assurez-vous que quelqu’un puisse venir vérifier régulièrement le bon fonc-
tionnement de celui-ci et ceci en tenant compte de son autonomie de
fonctionnement.
30
schroeven linksonder en plaats ze op
de schroeven rechts.
5. Draai de twee schroeven links-onder
los.
6. Schroef het middenscharnier los;
verwijder de deur van de koelruimte
door hem naar beneden te schuiven
7. Draai met een schroevendraaier de
twee beschermdopjes op de gaatjes
links los en monteer ze aan de rech-
terkant.
8. Draai de stift van het bovenscharnier
los en monteer haar aan de
linkerkant. Vergeet de sluitringetjes
niet.
9. Plaats de deur van de koelruimte op
de bovenstift.
10. Plaats het middenscharnier in het
onderste deel van de deur van de
koelruimte; vergeet de sluitringetjes
niet.
11. Schroef het middenscharnier ste-
vig vast.
12. Plaats de deur van de vriesruimte op
het middenscharnier.
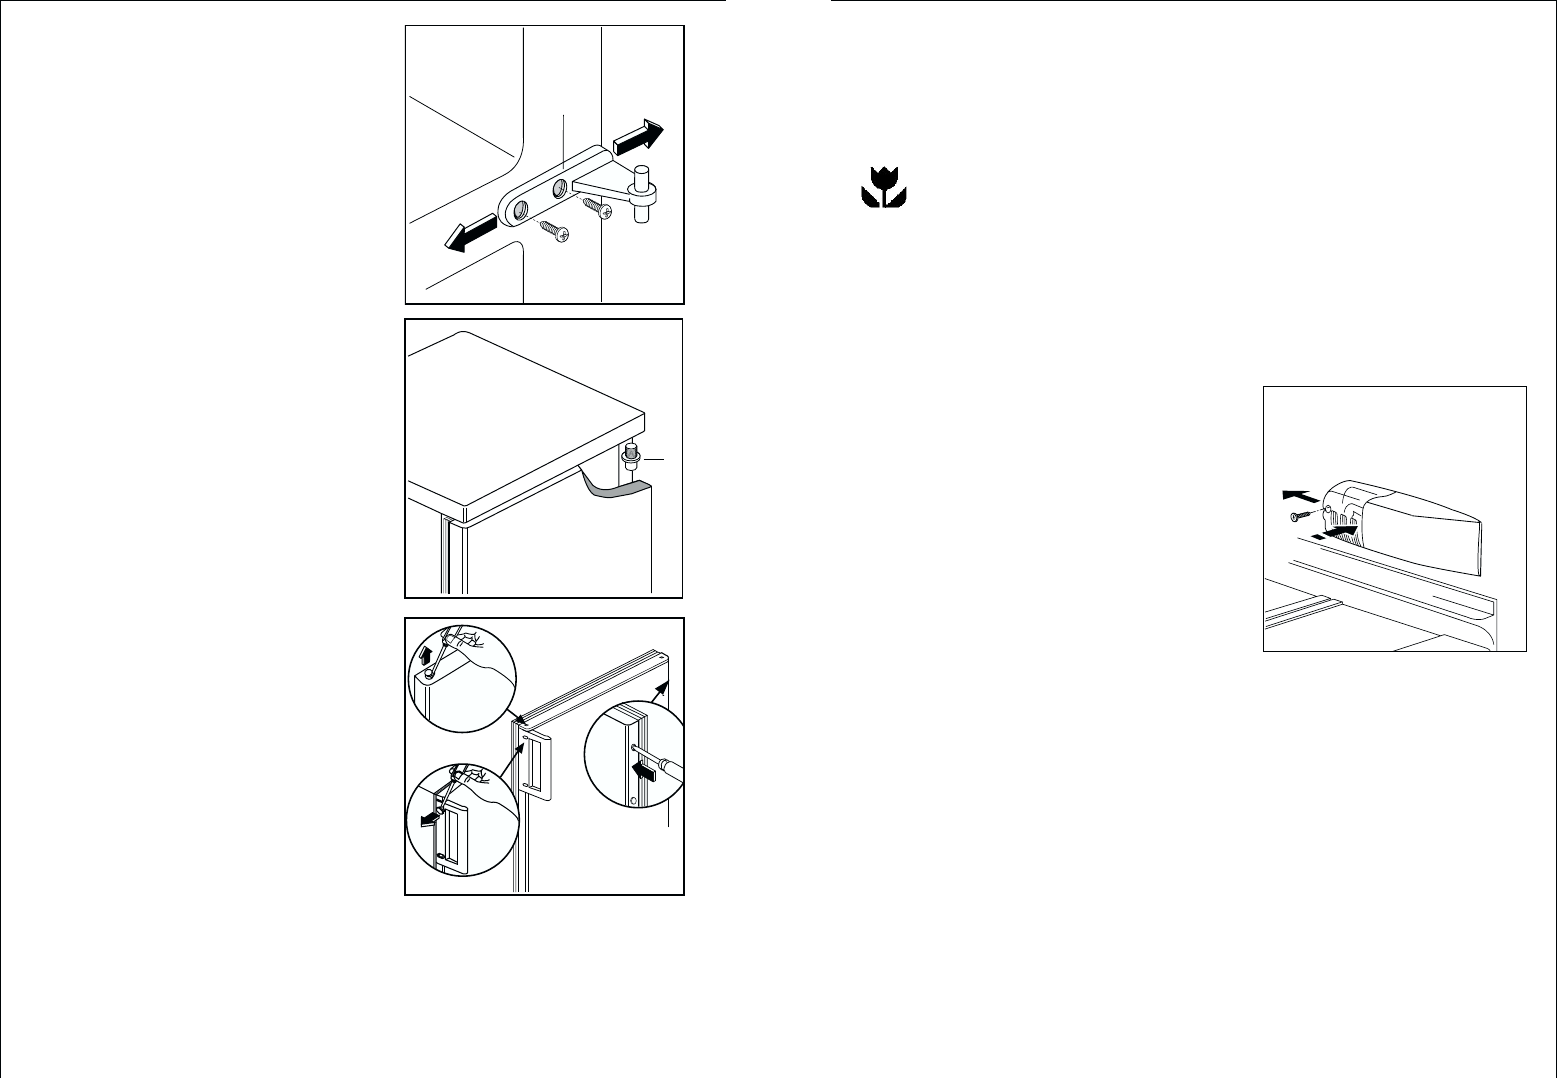
13. Verwijder het onderscharnierstift en
breng hem aan de andere kant het
onderscharnier (E) weer aan.
14. Plaats het onderscharnier in het
onderste deel van de deur van
de vriesruimte. Schroef het
onderscharnier goed vast.
15. Verwijder het stopstuk (F) uit het
ventilatierooster (D) door het naar de
pijlrichting te duwen en breng het
aan de andere kant weer aan.
16. Hermonteer het ventilatierooster (D), voer het door palwerk in.
17. De handgreep losschroeven. Aan de andere kant van de deur bevestigen
nadat u de dopjes met een priem doorgeprikt heeft. De vrijgekomen
gaatjes afsluiten met de bijgeleverde dopjes; deze vindt u in het zakje
van de documentatie.